
How to Make the Best Ninja Creami Protein Ice Cream at Home
Introduction
Is it really possible to enjoy creamy, indulgent ice cream while meeting your protein goals? With the rise in popularity of ninja creami recipes, the answer is yes—and thousands of fitness-focused foodies agree. According to Google Trends, interest in Ninja Creami recipes has surged by over 70% in the last 12 months, especially among those seeking high-protein, low-sugar alternatives.
In this post, you’ll learn how to make the best Ninja Creami protein ice cream at home, combining rich flavor, smooth texture, and optimal macros—all in less time than most traditional recipes.
Ingredients List
Here’s what you’ll need to make your high-protein frozen treat:
- 1 scoop vanilla whey protein (or your favorite flavor)
- 1 cup unsweetened almond milk (can substitute oat or dairy milk)
- 1/2 tsp xanthan gum (for creaminess)
- 1 tsp vanilla extract
- 1 tbsp sugar-free pudding mix (optional, for texture)
- 1 tbsp zero-calorie sweetener (like stevia or erythritol)
- Pinch of sea salt
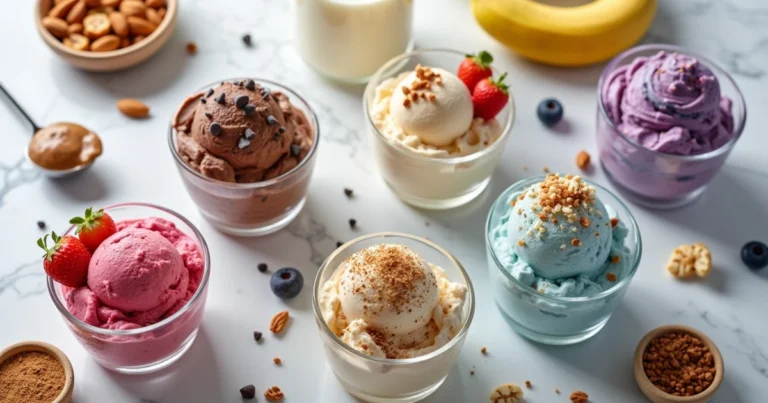
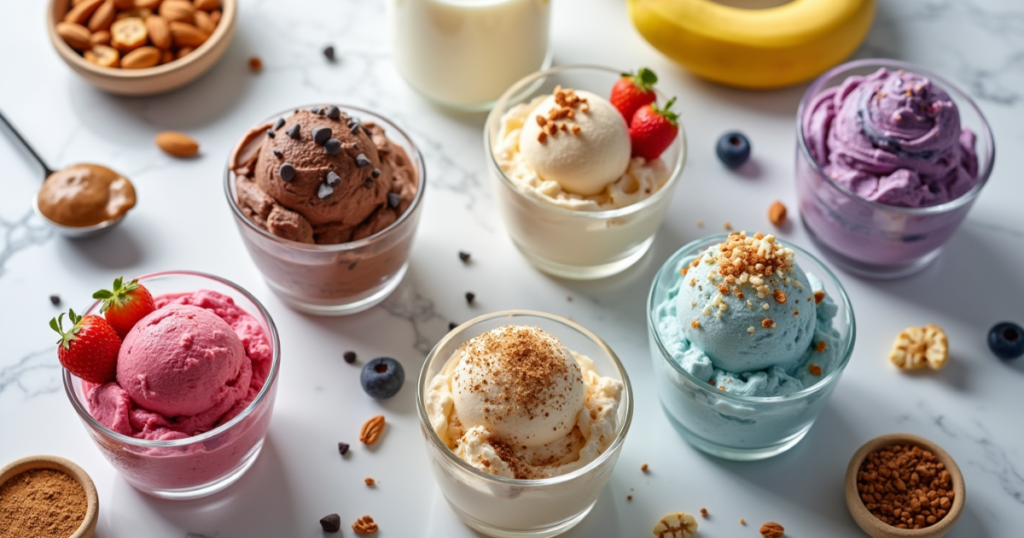
- Optional add-ins: dark chocolate chips, crushed berries, nut butter
The combination of whey protein, xanthan gum, and sugar-free sweetener provides a creamy mouthfeel while keeping calories low.
Timing
One of the biggest perks of Ninja Creami recipes is speed and simplicity:
- Prep time: 5 minutes
- Freezing time: 12-24 hours
- Spin time in Ninja Creami: 2-5 minutes
- Total time: ~24 hours
Compared to traditional churned recipes that take 30–40% longer to freeze and mix, the Ninja Creami significantly reduces hands-on effort.
Step-by-Step Instructions
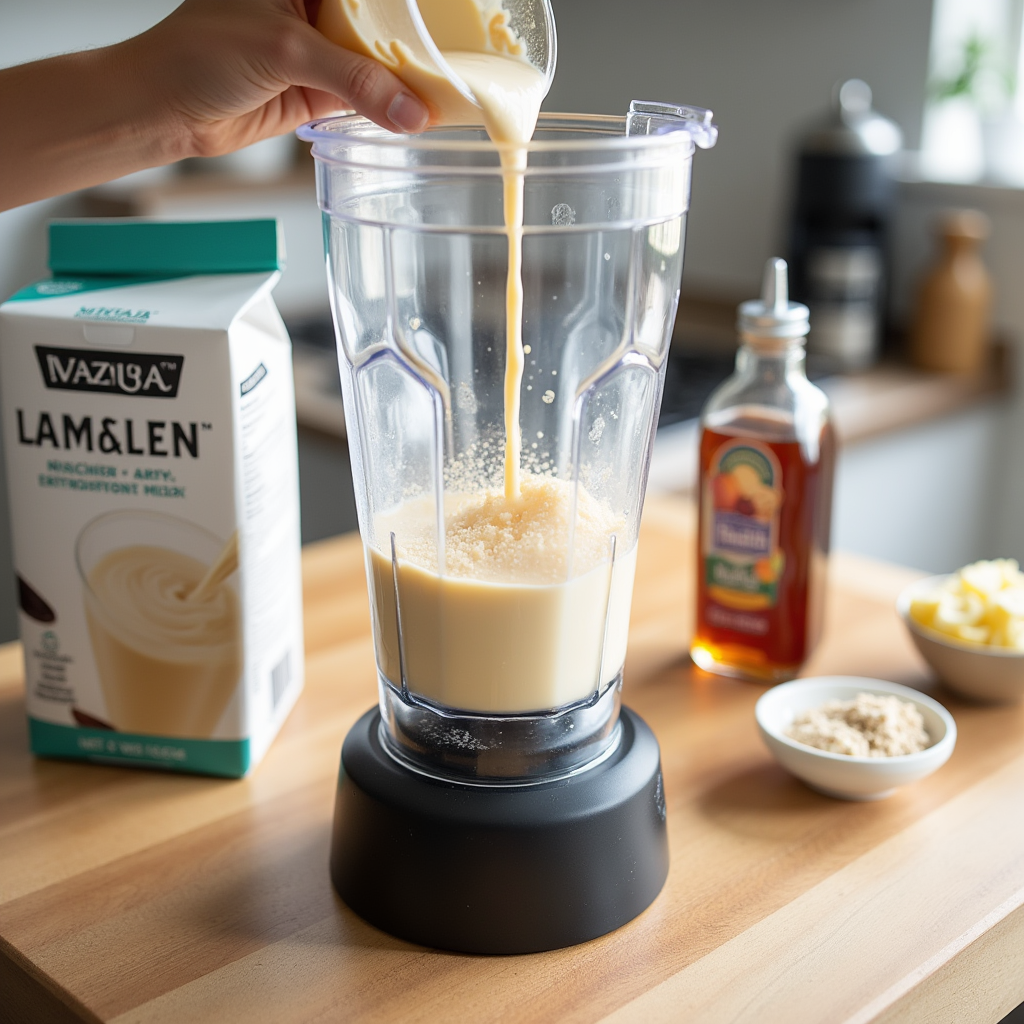
Step 1: Mix Your Base
In a blender or mixing bowl, combine the protein powder, almond milk, xanthan gum, vanilla extract, sweetener, and pudding mix (if using). Blend until smooth.
Tip: Mix thoroughly to avoid gritty texture after freezing.
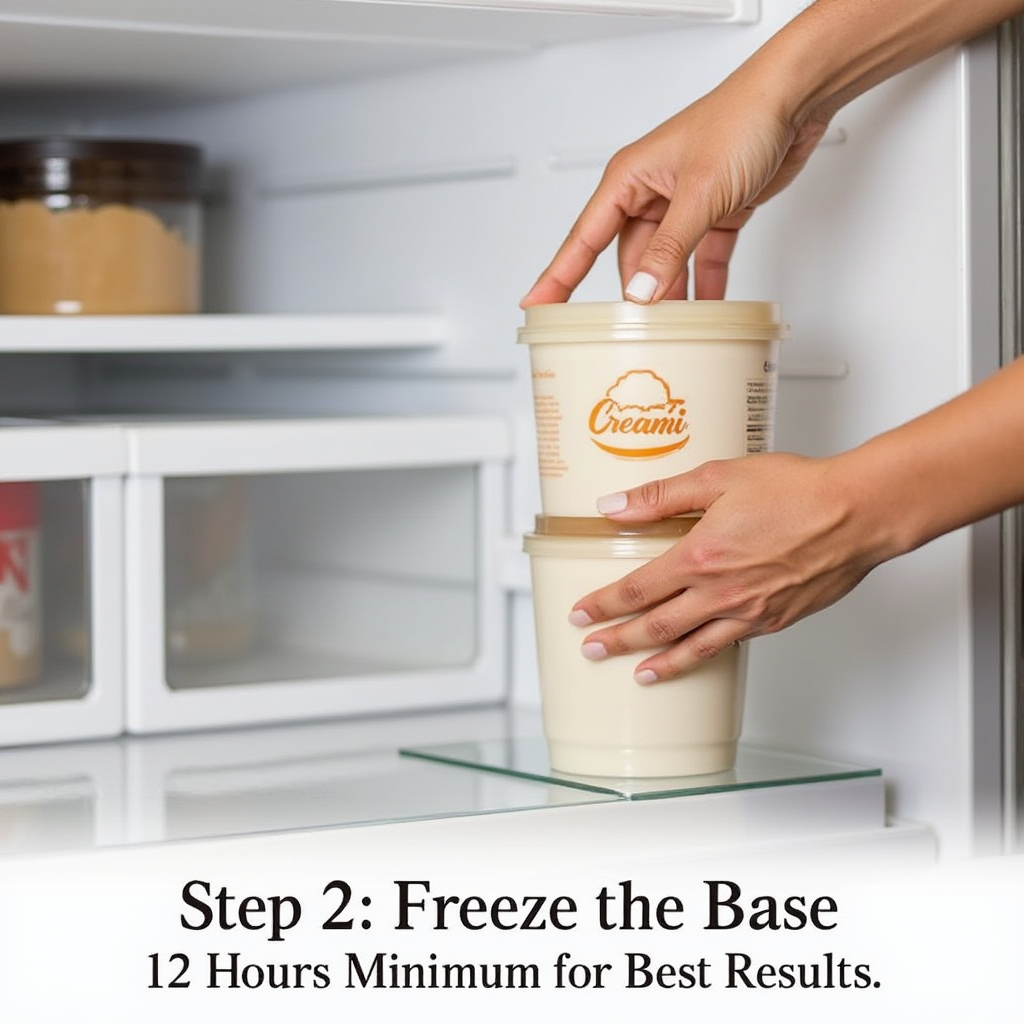
Step 2: Freeze the Base
Transfer the blended mixture into a Ninja Creami pint container.. Place the lid securely and freeze for at least 12 hours (overnight is ideal).
Tip: Set the container on a level surface in the freezer to ensure even freezing.
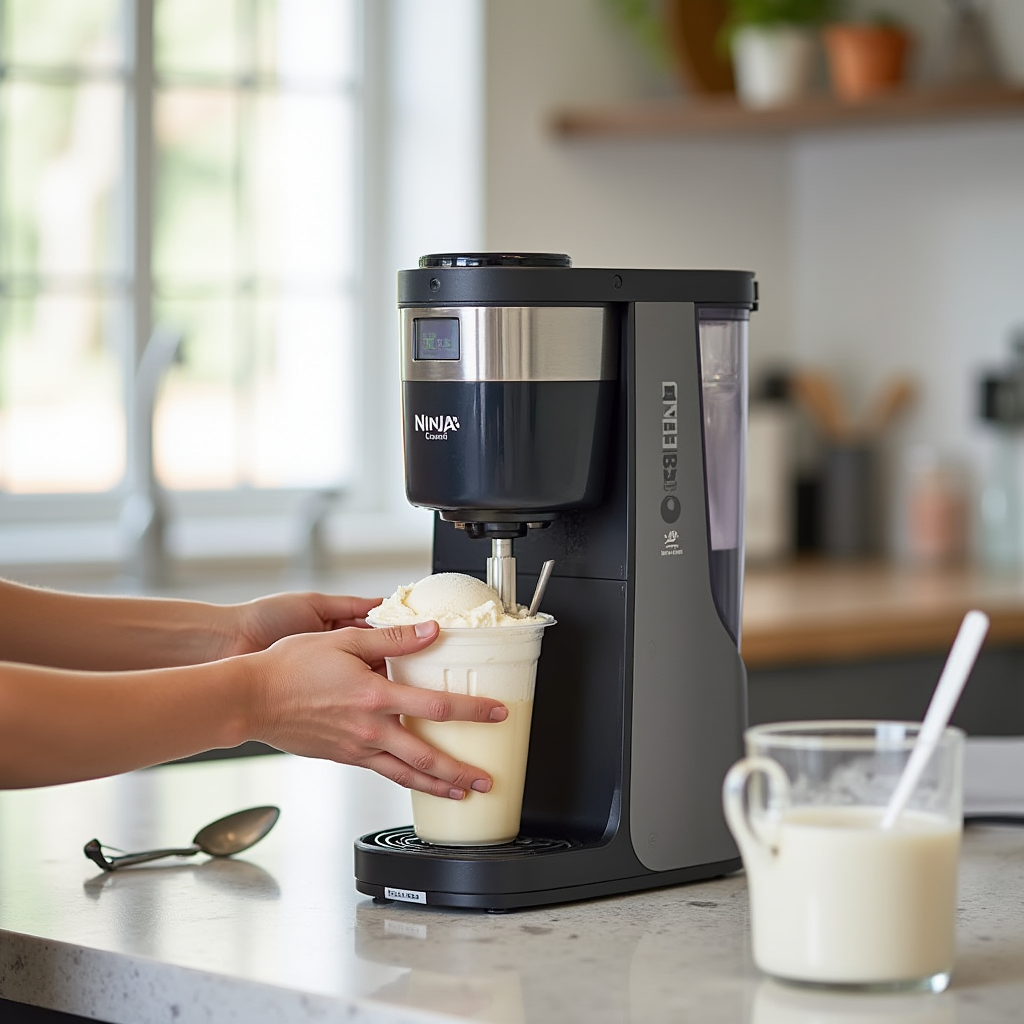
Step 3: Spin in the Ninja Creami
Remove the pint from the freezer. Insert it into the Ninja Creami machine and run the “Lite Ice Cream” or “Creami” cycle.
Tip: If it appears crumbly after the first spin, add 1-2 tbsp of milk and re-spin for a smoother consistency.
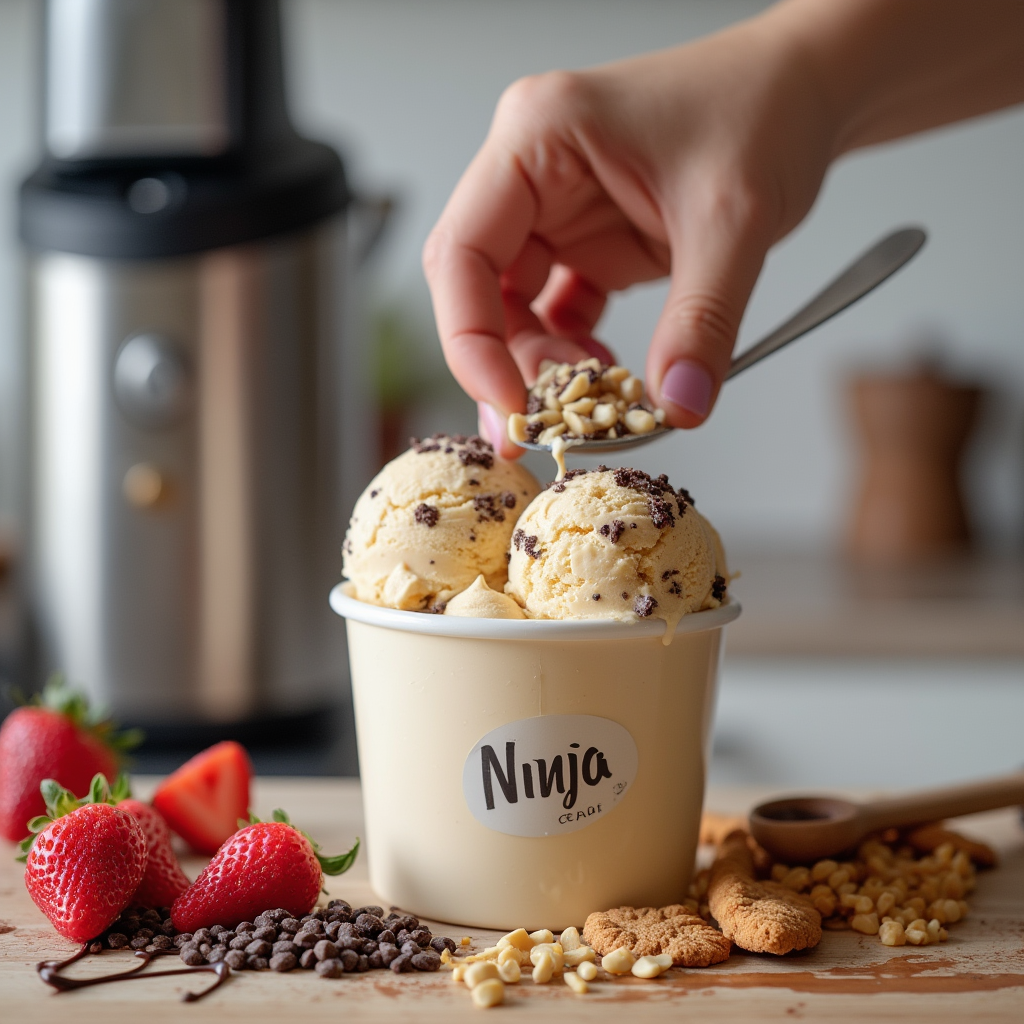
Step 4: Customize & Serve
After the second spin, your ice cream should be smooth and creamy. Stir in any optional toppings or mix-ins and enjoy immediately.
Tip: For mix-ins, use the “Mix-In” setting to evenly distribute chunky additions.
Nutritional Information
Per serving (based on 2 servings total):
- Calories: 130
- Protein: 22g
- Carbohydrates: 5g
- Sugars: <1g
- Fat: 3g
- Fiber: 1g
This recipe delivers a high protein-to-calorie ratio, making it ideal for post-workout recovery or guilt-free snacking.
Healthier Alternatives for the Recipe
Want to tweak the base recipe for different goals or dietary needs? Try these swaps:
- Vegan version: Use a plant-based protein powder and oat or soy milk.
- Keto-friendly: Add MCT oil and avoid the pudding mix.
- Lactose-free: Use lactose-free whey or plant protein.
- Low-calorie option: Replace milk with water (though texture may suffer slightly).
You can also incorporate superfoods like chia seeds, matcha powder, or collagen peptides for added benefits.
Serving Suggestions
Serve your protein ice cream in creative ways:
- In a bowl topped with crushed almonds and sugar-free chocolate drizzle
- Enjoy it after your workout with a spoonful of almond butter for added richness and recovery fuel.
- Layered in a parfait glass with berries and granola
- In a waffle cone for a traditional ice cream feel
- Frozen sandwich style between two protein cookies
These ideas make it more versatile and fun for the whole family.
Common Mistakes to Avoid
Even the best Ninja Creami recipes can go wrong. Here’s what to watch out for:
- Skipping the xanthan gum – leads to icy, gritty texture.
- Not blending well – results in clumps or uneven texture.
- Freezing for less than 12 hours can result in a base that’s too soft to spin properly.
- Using excessive protein powder may result in a chalky texture and less creamy consistency.
- Forgetting the re-spin – crumbly ice cream can easily be fixed.
Avoiding these issues ensures consistently creamy results.
Storing Tips for the Recipe
Want to store leftovers or prep ahead? Here’s how:
- Store in the Ninja Creami pint with lid sealed.
- Re-spin before eating again to restore texture.
- Freeze up to 7 days for best quality.
- Avoid thawing and re-freezing, which alters texture.
You can even batch prep multiple pints and freeze for rotating flavors each week.
Conclusion
Making the best Ninja Creami protein ice cream at home is easy, fast, and fun with the right ingredients and tools. You’ll enjoy a high-protein treat that fits into your healthy lifestyle without sacrificing taste or texture.
Try the recipe today, leave your review in the comments, and don’t forget to subscribe for more high-protein, low-guilt dessert ideas!
FAQs
Q: Can I use casein protein instead of whey?
A: Yes, but the texture may be thicker. You might need extra liquid.
Q: What if my mixture is too hard after freezing?
A: Add a splash of milk and run the re-spin cycle for smooth texture.
Q: Can I double the recipe?
A: You can make multiple pints, but each should be frozen and spun separately.
Q: Is this recipe safe for kids?
A: Yes! Just use a kid-friendly protein powder and limit sweeteners.Q: Can I make it without sweetener?
A: Yes, but it will taste more like a yogurt-based treat. Add fruit for natural sweetness.
Overlay7